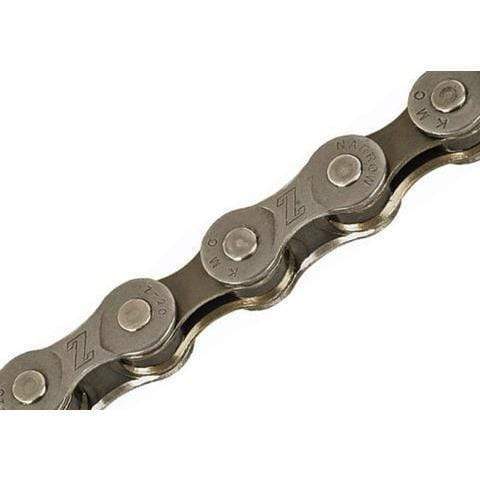
A bicycle chain is a crucial part of your drivetrain, responsible for transferring power directly from your pedals to the rear wheel. Over time, chains wear down due to friction, dirt, and metal-on-metal contact. This wear leads to poor shifting performance, chain slipping, and premature wear on your expensive cassette and chainrings. Replacing your bike chain at the right time ensures crisp shifting, extends the life of your drivetrain, and saves you money in the long run.
Understanding Chain Speeds: How to Find the Perfect Match
Bicycle chains are not one-size-fits-all. Chains are engineered specifically around the number of rear gears (cogs) on your bike's cassette or freewheel. As drivetrains evolved from 8-speed up to modern 12-speed and 13-speed systems, the physical spacing between cassette cogs became much tighter. To clear those narrow gaps without rubbing, higher-speed chains are made significantly narrower on the outside.
How to Tell How Many Speeds Your Chain Is
If you need to replace your chain or figure out what is currently on your bike, use these quick methods to identify your chain speed:
- Count the Rear Cogs: The easiest and most reliable way to identify your chain speed is to count the individual gears on your rear cassette. If your rear wheel has 11 gears, you need an 11-speed chain. If it has 12 gears, you need a 12-speed chain.
- Check the Outer Link Stamps: Examine the outer side plates or the quick link (master link) on your chain. Manufacturers like Shimano, SRAM, and KMC frequently stamp the model or speed rating directly into the metal (such as "11S", "12S", or "Eagle").
- Look at Your Rear Derailleur: Most modern rear derailleurs have the speed series printed on the cage or body (for example, Shimano 105 11-speed, SRAM Eagle 12-speed, or Shimano Deore 10-speed).
- Identify E-Bike Specific Chains: Mid-drive electric bikes put massive torque through the drivetrain. E-bike chains match standard speed widths but feature thicker side plates and reinforced rivets to handle higher loads.
Why Bike Chains Wear Out
Many riders believe that chains stretch out over time, but the metal plates do not actually stretch. Instead, tiny internal components including rivets, rollers, and pins slowly wear down from constant friction. This internal wear creates slop between the links, causing the chain to elongate and misalign with your cassette teeth.
- Chains wear out due to internal component friction, not actual metal stretching.
- Worn chains cause sloppy shifting, gear skipping, and rapid cassette wear.
- Replacing a chain on time prevents costly damage to your chainrings and cassette.
How to Check for Chain Wear
Checking your chain regularly takes less than two minutes and helps you avoid unexpected breakdowns or expensive drivetrain overhauls. A simple chain wear indicator tool measures elongation accurately so you know exactly when to swap it out.
- Insert the Tool: Drop the teeth of your chain wear indicator into the chain links.
- Read the Measurement: Most tools feature markings for 0.5% and 0.75% wear.
- 0.5% Wear: Time to start shopping for a replacement chain soon, especially on 11-speed and 12-speed drivetrains.
- 0.75% Wear or Higher: Replace the chain immediately. Riding beyond 0.75% wear damages cassette teeth rapidly.
How to Clean Your Bike Chain
A clean chain runs quieter, shifts faster, and lasts significantly longer. Dirt and road grit mix with chain lube to create an abrasive paste that grinds away at your components. Follow these quick steps for a spotless chain:
- Degrease: Apply a high-quality bike degreaser while backpedaling to break down old grease and road grime.
- Scrub: Use a stiff-bristled brush or a dedicated clip-on chain cleaning tool to scrub dirt out from between the rollers.
- Rinse & Dry: Wipe the chain thoroughly with a clean rag until completely dry.
- Lubricate: Apply one drop of bike-specific chain lube directly to each individual roller while backpedaling slowly.
- Wipe Off Excess: Let the lube penetrate for a few minutes, then wipe down the outside of the chain with a dry rag. Excess lube on the outside only attracts fresh dirt!
Best Lubrication Practices
Choosing the right chain lubricant depends on where and how you ride. Using household spray oils like WD-40 washes away factory grease and attracts heavy dirt, so always stick to bike-specific lube.
- Dry Lube: Formulated with wax or Teflon for dusty, dry conditions like local San Diego trails and roads. It sets up dry so dirt does not stick, but requires more frequent application.
- Wet Lube: Thicker and water-resistant for rainy or muddy winter conditions. It stays on through wet rides, but requires thorough cleaning afterward to prevent grime buildup.
- Wax-Based Lube: Creates a ultra-clean barrier that repels dirt completely, perfect for road and gravel riders looking for maximum drivetrain efficiency.
When to Replace Your Bike Chain
A well-maintained chain typically lasts between 1,500 and 3,000 miles. However, hard climbing, aggressive mountain biking, wet weather, or heavy e-bike motor torque can shorten that lifespan. Inspecting your chain every month ensures you stay ahead of excessive wear.
Shop the Best Bike Chains Today
Keeping a fresh chain on your bike is the single best way to preserve your shifting performance and protect your investment. Whether you ride a lightweight road bike, a full-suspension mountain rig, or a daily commute e-bike, Bicycle Warehouse has the exact chain speed and brand you need. Explore our full selection of Shimano, SRAM, and KMC chains online or stop by your local shop today!